In today’s competitive product development landscape, compelling visual content is essential from concept to customer delivery. 3DEXPERIENCE SOLIDWORKS Visualize Connected empowers teams to create high-quality, photorealistic images and animations directly linked to the latest CAD data, streamlining collaboration between engineering and marketing. By leveraging a cloud-based, version-controlled environment, it eliminates file-sharing bottlenecks, reduces errors from outdated visuals, and accelerates review cycles, enabling faster, more consistent, and visually aligned product launches.
Here are a few points that lead you to leverage and access visualize.
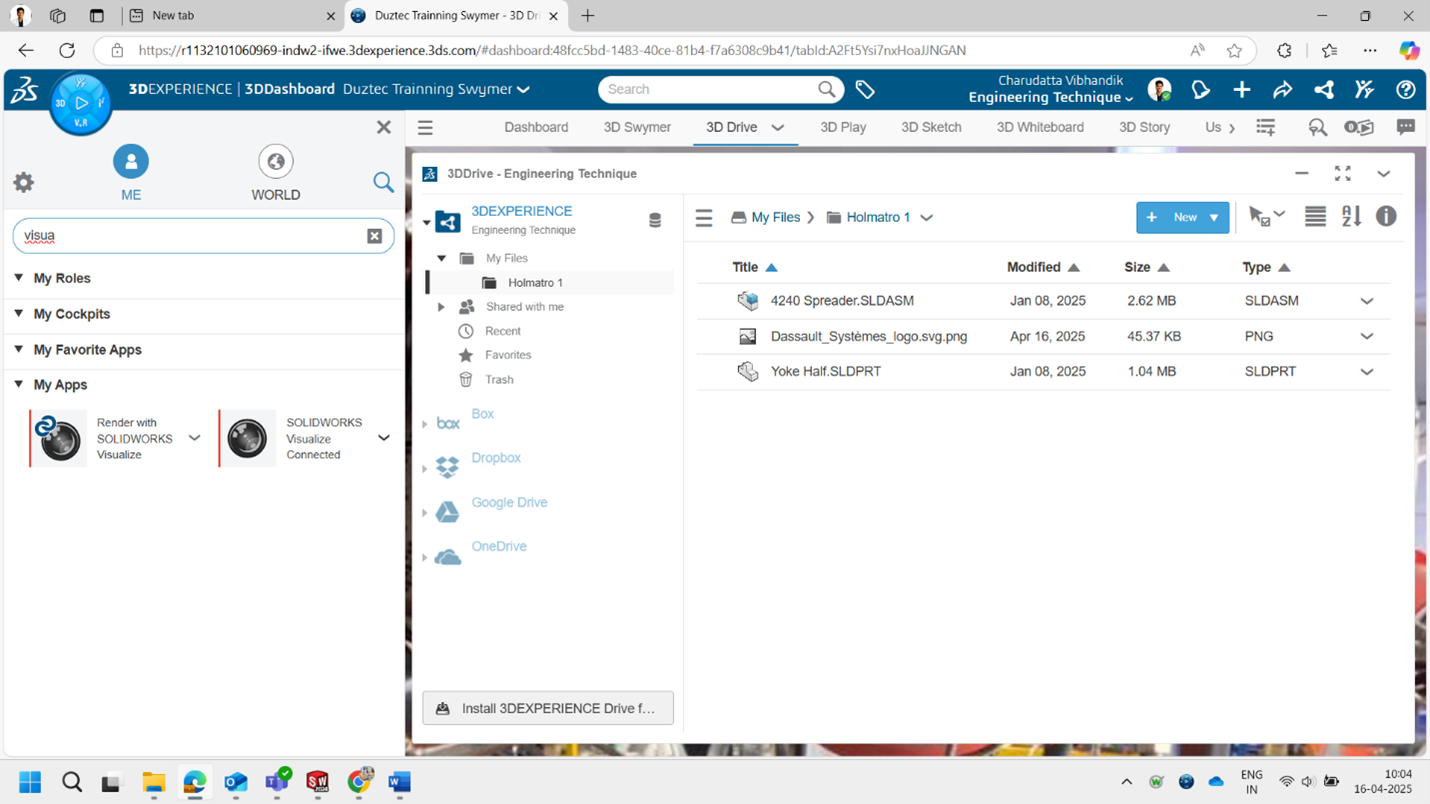
1: How to access 3D Experience Visualize Connected
Access directly from the Platform (When you are using SOLIDWORKS VISUALIZE connected)
- From the 3DEXPERIENCE dashboard, launch Visualize Connected and open your model directly without exporting or saving files locally.
- The data is linked live to its current revision, ensuring you're always working with the most accurate design version.
- Visualize Connected automatically creates a project workspace tied to the model in the cloud
2: Design on the SOLIDWORKS by collaborating with the 3DEXPERIENCE Platform
- Begin your design in 3DEXPERIENCE SOLIDWORKS or use Collaborative Designer for SOLIDWORKS to upload existing models to the platform.
- The design is securely stored with built-in revision control, access management, and lifecycle state tracking.

3: Apply Materials and Set the Scene
- Use the Visualize material library or bring in custom PBR textures and appearances to match your product's finish and branding.
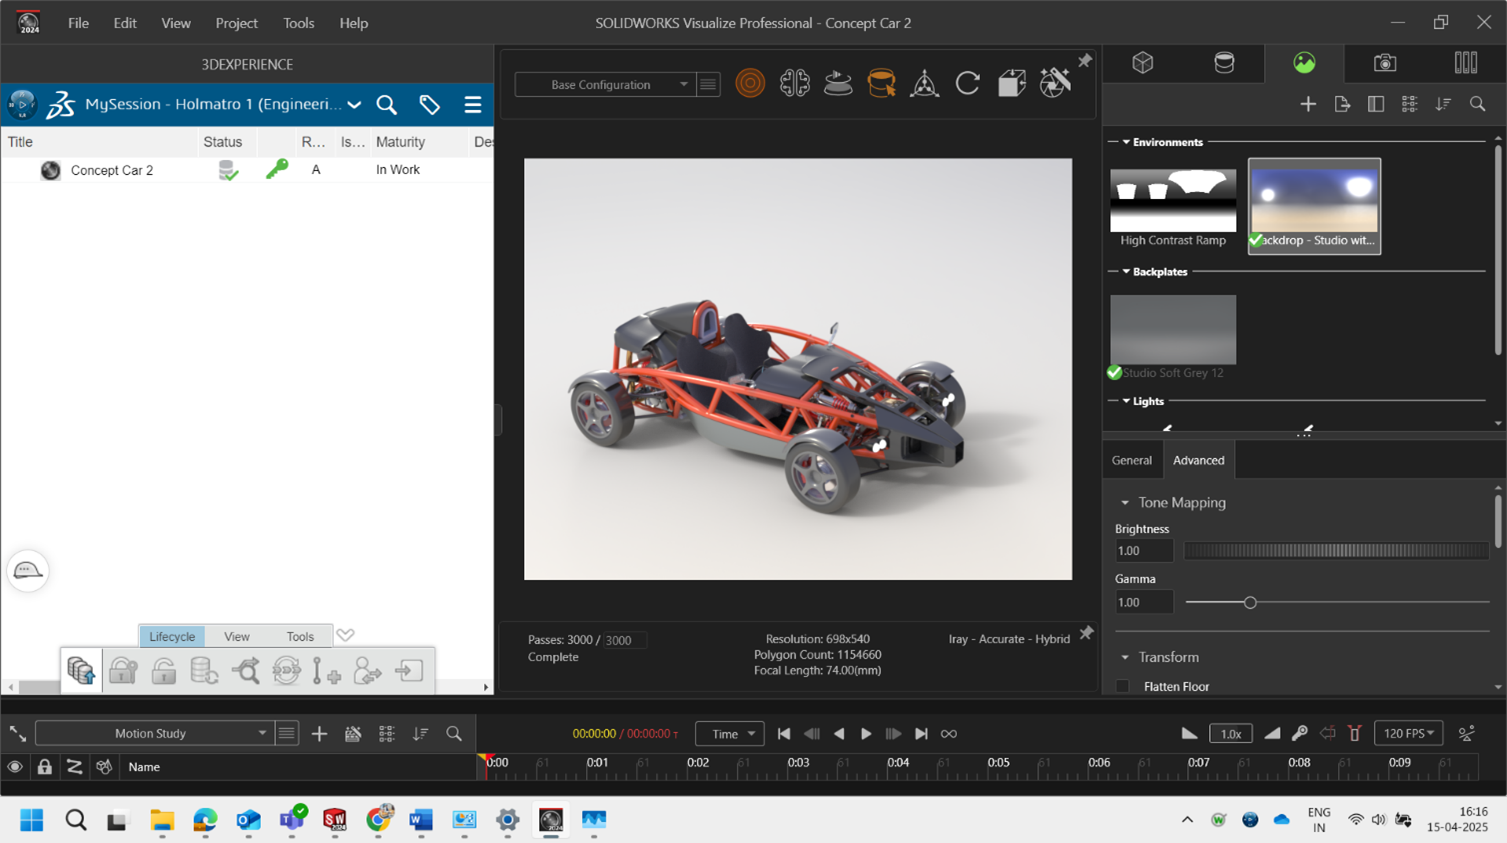
- Add HDRI environments, lighting setups, and backgrounds to simulate real-world contexts.
- Scene templates and environment setups can also be reused across projects, promoting consistency and saving setup time.
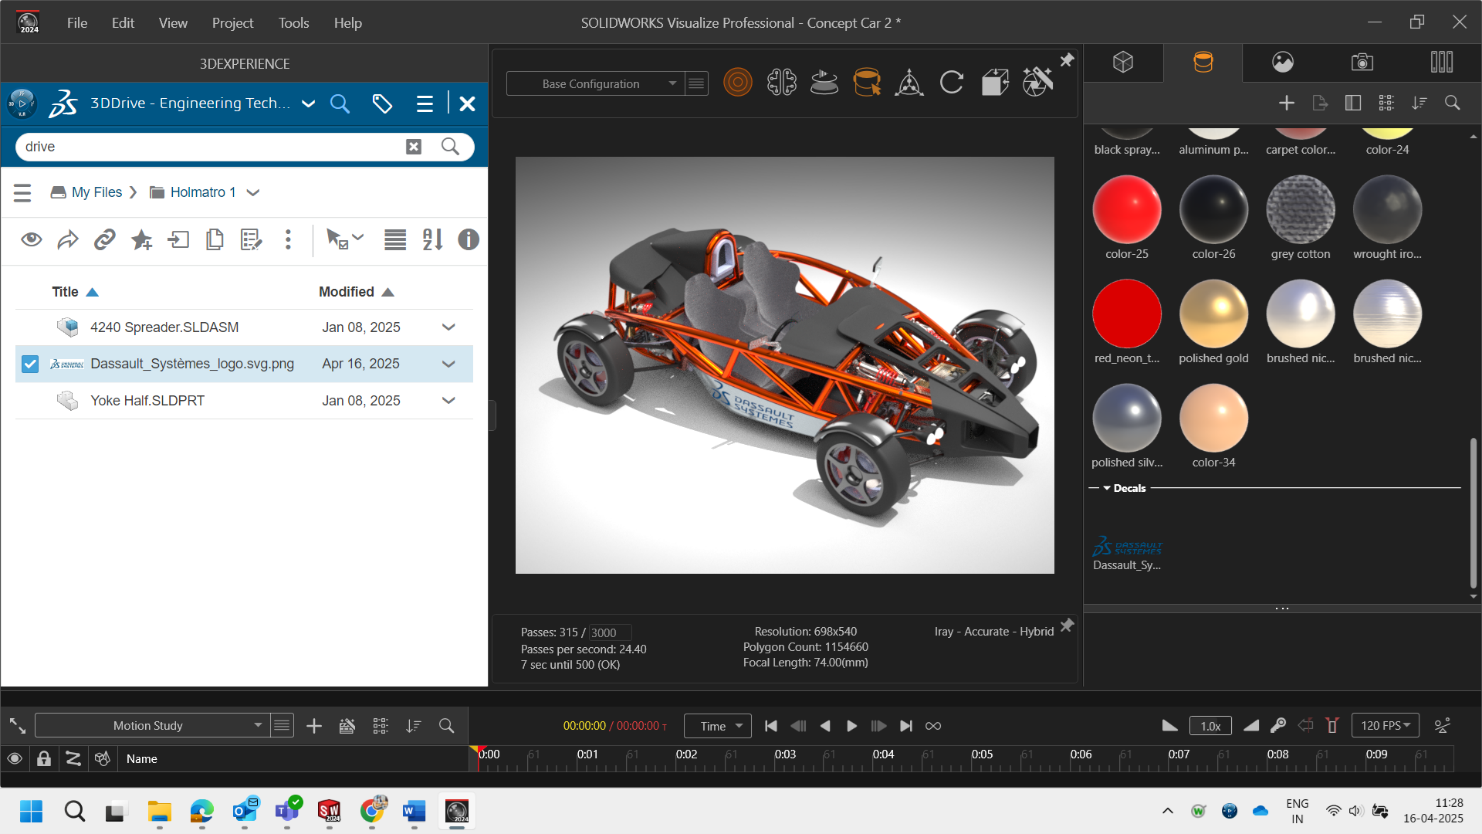
4: Apply Decals Directly From 3D Drive
- Search the drive on the task pane and locate the file that you want to insert
- You can directly drag and drop decals or appearances from the task pane of 3D Experience
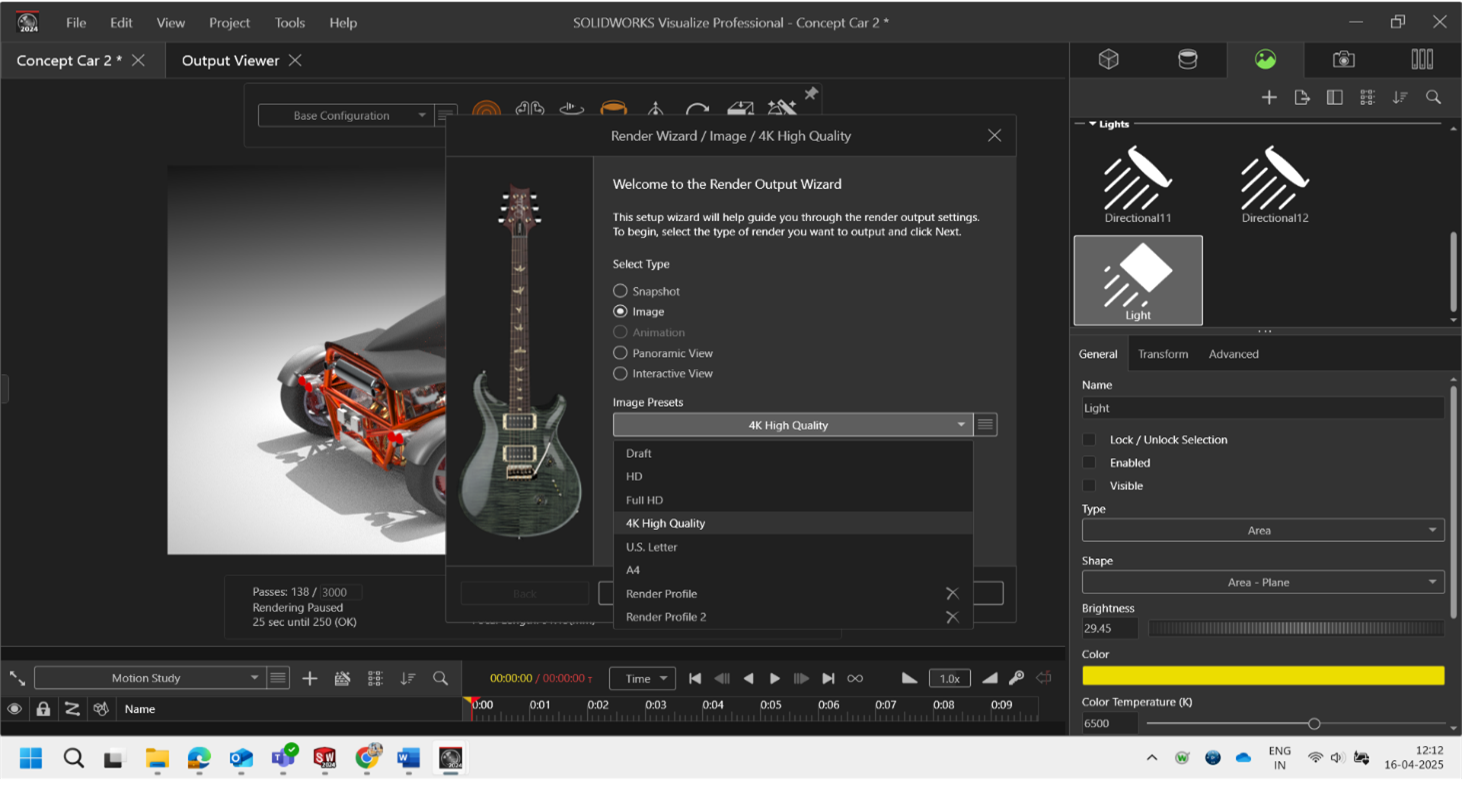
5: Exporting Output in SOLIDWORKS Visualize Connected
Once your render setup is complete in
SOLIDWORKS Visualize Connected, exporting high-quality output is straightforward and fully integrated with the 3DEXPERIENCE workflow:
- You can export still images, turntable animations, or video sequences in popular formats such as PNG, JPEG, TIFF, MP4, and more.
- Users can specify custom resolutions, render quality settings, and apply render passes (e.g., alpha channels, depth maps) for post-processing needs.
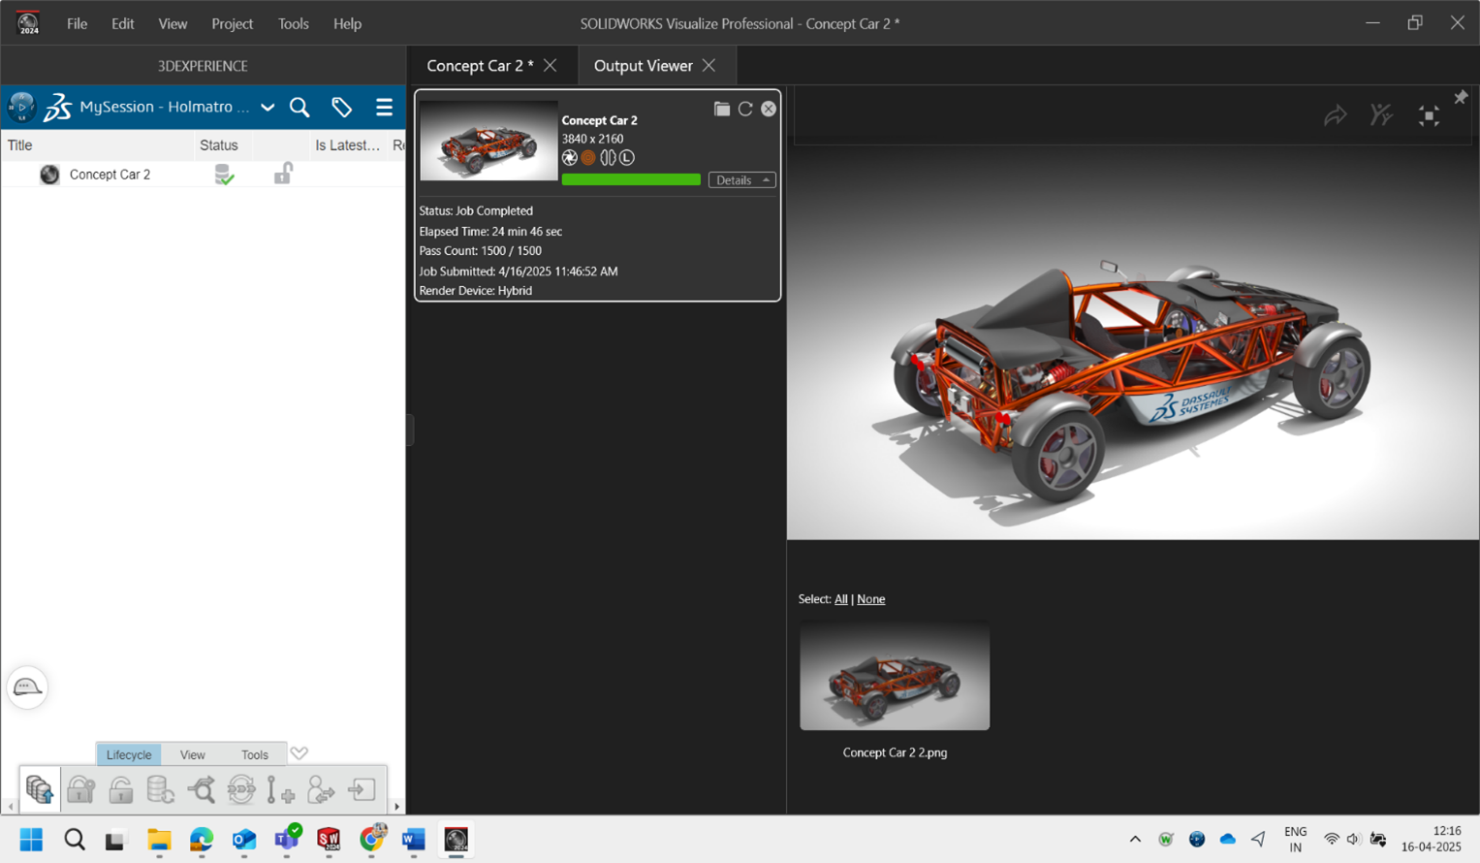
- Final outputs can be directly saved back into the 3DEXPERIENCE platform, making them accessible to stakeholders via dashboards, communities, or shared spaces—eliminating the need for local file transfers.
- Since all exported assets are revision-controlled and linked to the project, it ensures traceability and consistency across marketing, design reviews, and client-facing content.
- Exported media can be reused, updated, or replaced easily, aligning with the current design revision without the need to recreate scenes from scratch.
Conclusion:
3DEXPERIENCE SOLIDWORKS Visualize Connected delivers a cloud-powered rendering solution that perfectly aligns visuals with the latest CAD data—eliminating exports, version mismatches, and local file limitations. With centralized asset management, real-time updates, and secure collaboration, teams can create, review, and publish photorealistic content anytime, anywhere. This connected workflow enhances visual communication, shortens approval cycles, and ensures consistent, high-quality output across design and marketing.
Engineering Technique is an Authorized Value-added Reseller of SOLIDWORKS Desktop 3D CAD & 3DEXPERIENCE Works Cloud CAD software in Ahmedabad, Vadodara, Surat, and across Gujarat, including Mumbai.
For inquiries, feel free to reach out:
Call: +91 94276 11239
Email: marketing@enggtechnique.com
Thank you for Reading!
Author: Charudatta Vibhandik, Post Sales Application Engineer